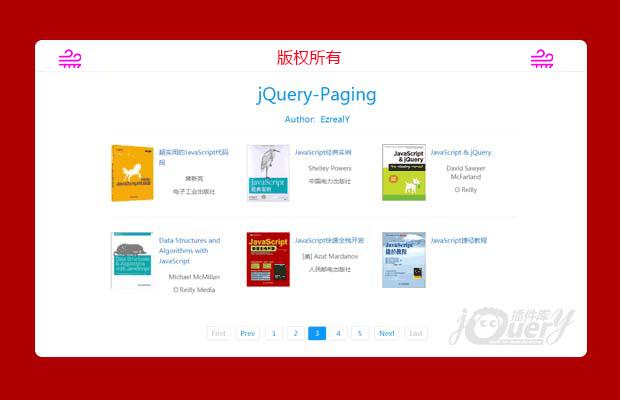
插件描述:基于jQuery的分页及数据获取插件
jQuery-Paging
1. 在HTML文件中写入如下代码,再将相应的CSS/JS/Data文件引入即可
1 2 3 4 5 6 7 8 9 10 11 12 | <div id="resultBox"></div> <div id="paging"> <div class="first">First</div> <div class="prev">Prev</div> <ul class="list"></ul> <div class="go"> <input type="text" placeholder="Goto"> <button>GO</button> </div> <div class="next">Next</div> <div class="last">Last</div> </div> |
2. Paging 的配置参数
1 2 3 4 5 6 7 8 9 10 11 12 13 14 15 16 17 18 19 20 21 22 23 24 | $('#paging').paging({ nowPage: 1, // 当前显示页 allPages: Math.ceil(data.count / 6), // 所有页(由传入的数据决定) displayPage: 7, // 分页列表显示的个数 callBack: function (now) { // 回调函数,用于数据获取 var currentPages = now * 6 < books.length ? 6 : books.length - (now - 1) * 6; $oResultBox.html(''); for (var i = 0; i < currentPages; i++) { var num = (now - 1) * 6 + i; var create_dl = $('<dl></dl>'); var _html = '<dt>'+ '<a href='+books[num].alt+' target="_blank"><img src='+books[num].image+'></a>'+ '</dt>'+ '<dd>'+ '<a href='+books[num].alt+' target="_blank" class="title">'+books[num].title+'</a>'+ '<p class="author">'+books[num].author+'</p>'+ '<p class="publisher">'+books[num].publisher+'</p>'+ '</dd>'; create_dl.html(_html).addClass('bounceIn animated'); $oResultBox.append(create_dl); } } }); |
3. 关于数据的获取使用
在这个页面中,数据的获取来源于豆瓣API,写的时候为了方便,我将其存到了个data.js文件中。如果你要改变数据的话,将数据放进去,然后包裹在一个data的变量中即可。
4. 插件的分页效果所支持:
4-1) 首尾页/上下页/跳转页/列表页
4-2) 自定义当前页面所显示的页数,默认是7页。(注: 页数最好大于3且是奇数,这样比较美观)
结尾:
1. 如果想要兼容到IE8的话,需要下载jQuery1.9x及以下的版本,IE8下分页效果就没有问题了,但是数据的获取那里还是有点问题。标准浏览器就全部没有问题。
2. 数据获取那里,以后我会更新成Ajax获取方式。
3. 数据来源于豆瓣API。
4. 有什么问题可以留言以及发邮件给我(1005526074@qq.com)
特别申明:
本站所有资源都是由网友投稿发布,或转载各大下载站,请自行检测软件的完整性!
本站所有资源仅供学习与参考,请勿用于商业用途,否则产生的一切后果将由您自己承担!
如有侵权请联系我们删除下架,联系方式:lei1294551502@163.com
- 上一个特效: jQuery页面滚动数字增长插件jQuery.Running.js
- 下一个特效: H5下拉刷新上拉加载更多